
LED Floor Screen Installation: Recessed Pit vs Surface-Mount Explained
Pit depth 300–650 mm · Steel frame · Drainage · 7-step sequence · Service access
A walkable LED floor is a construction item as much as a display. This guide compares recessed pit and surface-mount installation, the structure each one needs, and the sequence a floor project actually follows from survey to sign-off.

LED Floor Screen Installation: Two Site Conditions, Two Methods
Every LED floor screen installation resolves to one of two site conditions. If the finished floor can be opened, the display is recessed into a pit and sits flush. If it cannot, the cabinets are surface-mounted on the slab and ramps or trim close the step. The cabinets are identical; the structural work and the edge detail are not.
Four questions decide it in one visit: what sits below the finished floor, how much height the perimeter can lose, how the floor will be serviced, and what building work the programme allows.
All three Excel LED platforms in the LED floor screen range are rated at a nominal 2,000 kg/m². That figure describes the cabinet, not the building — the slab, pit walls or steel frame below must be signed off by a structural engineer.
| Decision point | Recessed (pit) | Surface-mount |
|---|---|---|
| Finished floor line | Flush with surrounding floor | 73–82 mm plus feet above slab; ramp or trim covers the step |
| Structural work | Pit of 300–650 mm to the factory drawing, plus level steel frame | No excavation; frame or cabinet feet onto the slab |
| Drainage | Designed in: sump, membrane, ventilation | Dry slab only |
| Programme | Weeks of building work first | Days, once power and data are in |
| Typical fit | Flagship retail, museums, fixed stages, studios | Events, retrofits, upper floors, rentable space |
Recessed LED Floor Screen: Pit Depth, Steel and Drainage
A recessed floor is a small building project with a display inside it.
Pit depth. The cabinets are shallow — 77 mm iron, 73 mm COD, 82 mm die-cast — and the rest of the 300–650 mm carries the steel frame, feet travel, cable trays and drainage fall. The figure follows the issued drawing, not a rule of thumb.
Steel. Never shim cabinets onto bare concrete. A steel grid on the 500 mm cabinet grid carries load into the slab and is levelled as a whole grid with a laser. The 500×1000 mm iron cabinet floor brings its own adjustable feet to finish the surface.
Cabling. Power and data run in separate trays under the frame, with loops long enough to lift a cabinet clear of its neighbour. Label both ends and mark the drawing as installed.
Drainage. A below-floor cavity collects condensation and cleaning water: it needs a low point and drain, a membrane, and air movement. On the aluminum-base COD floor tiles, IP31 and indoor-rated, a wet pit is a scheduled failure.
Edge trim. A shadow gap or metal trim absorbs tolerance at stone, tile or timber, allows thermal movement and keeps the transition flush enough to walk across.
| Series | Cabinet size and depth | Pitch | Recessed note |
|---|---|---|---|
| Iron cabinet | 500×1000×77 mm, 22.5 kg | P2.97–P6.25 | Two per m², IP54 front / IP53 back, adjustable feet |
| Aluminum-base COD | 500×500×73 mm, 11 kg | P1.5–P2.6 | Indoor IP31; fine pitch, so the pit must stay dry |
| Die-cast rental | 500×500×82 mm, 11 kg | P1.5–P6.25 (no P5.2) | Quick-lock, magnetic front maintenance, IP65 / IP54 manufacturer-stated |
Surface-Mount LED Floor Screen: Ramps, Edges and Trip Safety
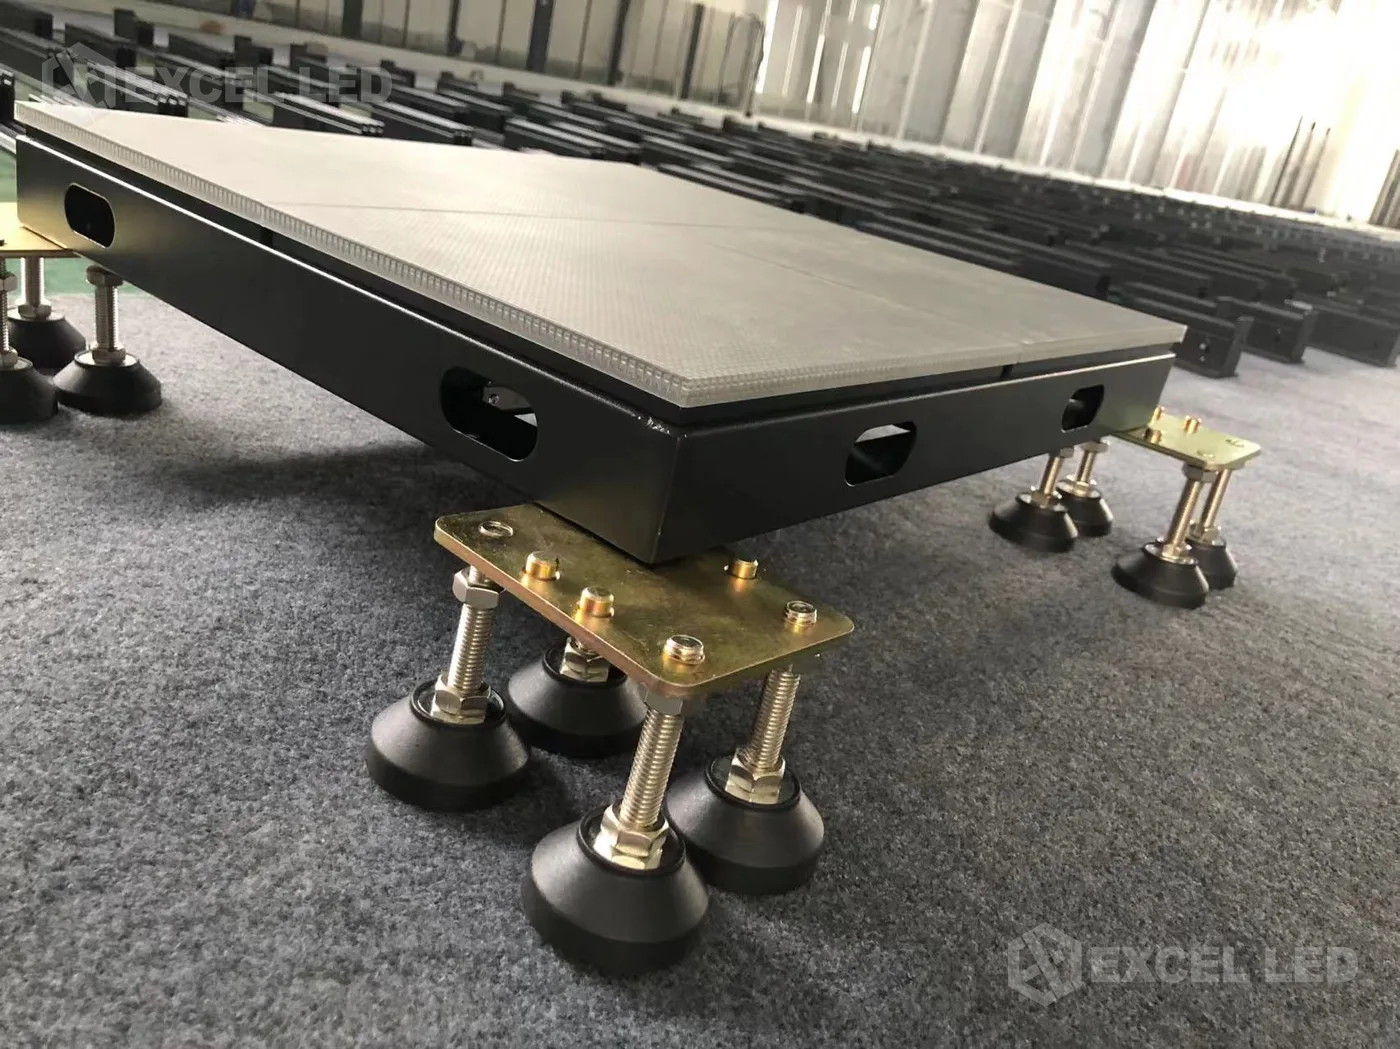
A surface-mount LED floor screen removes almost all building work and moves the difficulty to the perimeter. Cabinets land on the slab, the feet take out its irregularities, and a ramp or trim ring closes the height difference. For retrofits and venues that cannot close for structural work it is usually the only route — and for a die-cast rental dance floor it is the normal one.
- Build-up height. Plan the perimeter from cabinet depth: 77 mm iron, 73 mm COD, 82 mm die-cast, plus feet and ramp structure. In a doorway with a 20 mm threshold the ramps may not fit — a decision for before the order.
- Ramps. Many accessibility codes settle near a 1:12 gradient, so a 100 mm step implies roughly 1.2 m of run — check the local code rather than assuming it. Specify a matte slip-resistant surface, a contrast strip at the leading edge, and removable sections above cable routes.
- Trip safety. The risks repeat and are cheap to avoid: cable across the walking surface, square edges above roughly 6 mm where a bevel belongs, ramps that narrow an escape route, and loose transitions where ramp meets carpet.
- Edge trim. Where no ramp is needed — a stage edge, an island with a kerb — a trim or upstand does the same work in less depth and comes off with hand tools for service.
LED Floor Screen Installation Step by Step
The sequence ships with Excel LED project drawings and applies to both methods. Steps 1–3 are where money is saved or lost; steps 4–7 prove it.
- 1. Site survey. Room dimensions, finished floor level and what is under it, slab type and capacity, door and lift openings, power and control positions, and egress routes.
- 2. Drawings. Cabinet layout, pit or surface section, power and data single-line, service-access plan. The contractor prices from these, and site deviations go back onto the drawing.
- 3. Structure and first fix. Pit, steel grid or level deck built and inspected before the cabinets ship; trays and conduits in; drainage tested; frame signed off for level.
- 4. Cabinet assembly. Cabinets placed on the 500 mm cabinet grid, working outward from a datum line — 22.5 kg iron cabinets at two per square metre, or 11 kg die-cast tiles on quick locks.
- 5. Levelling. Adjustable feet bring each cabinet to datum, checked with a straight edge across neighbours and a laser across the field. Height is corrected at the feet, never by backing out fixings.
- 6. Wiring and mapping. Power distributed to the factory drawing, data connected, and the floor brought up in groups so faults are localised. Interactive sensing is module-level optical-magnetic wireless sensing, so there is no sensor loom — but each module must still be addressed and mapped to its position.
- 7. Calibration and acceptance. Brightness and colour matched on test patterns, seams checked under raking light, interactive zones walked end to end. Handover carries the factory aging-test report, a marked-up as-built drawing, spare modules from the same run and the 2-year warranty; certified models carry CE / FCC / RoHS / CCC marks.

The LED floor display buying guide covers the specification decisions in front of this sequence.
How an LED Floor Screen Is Serviced After Installation
Maintenance access is decided on the drawing, years before anyone needs it. Front maintenance releases a module from the walking surface with the cabinet in place; tile lifting takes the whole cabinet up on quick locks or a service lift. Tender documents routinely confuse the two.
On all three platforms modules release from the front, and the die-cast rental tile adds magnetic front maintenance — a repair becomes a one-person job with a suction tool. That matters most in a recessed floor, where the alternative is breaking the finish. It does not remove the need for a route to cabling, power supplies and control hardware: keep a labelled access hatch or removable edge trim.
- Spares and colour batch. Order spare modules with the project from the same production run and store them dry and flat. Colour and brightness are binned per batch, so a module added two years later can be technically correct and still visibly different under stage lighting.
- Routine care. A barely damp microfibre pass, no abrasives on the matte face, and a damp check of a recessed cavity alongside the venue’s other building services.
LED Floor Screen Installation Mistakes That Cost Money
These failures repeat across projects, roughly in the order they appear. All are cheaper to prevent than to fix once the floor is closed.
- Casting the pit before the installation drawing exists. A pit a hundred millimetres short cannot be corrected with feet.
- Reading the 2,000 kg/m² rating as slab capacity. A raised access floor, mezzanine or old timber deck may need reinforcement — an engineer’s call.
- Shimming cabinets onto an uneven slab. Load concentrates on a few feet, seams open, and the floor is relaid on the client’s time.
- No drainage or ventilation in the pit. Condensation has nowhere to go, and on an indoor IP31 platform that means corrosion.
- Undersized power. Peak draw reaches 800 W/m² against a 270 W/m² average, so circuits sized on average content trip on the first white test pattern.
- Designing the surface-mount perimeter last. Ramp gradient, egress width and trip edges are code items; a ramp that cannot fit forces a redesign.
- Buying spares later from a different batch. Same specification, different bin — the repair reads as a patch on camera.
- Leaving interactive content to the last day. Mapping and content timing still need commissioning time with the people who run the room.
LED Floor Screen Installation FAQ
Q1How deep does the pit need to be for a recessed LED floor screen?
300–650 mm, set by the factory drawing for your cabinet and pitch. Cabinets are only 73–82 mm deep; the rest carries steel, feet travel, cable trays and drainage fall.
Q2Is my floor slab strong enough to carry an LED floor screen?
Cabinets are rated 2,000 kg/m² nominal, with a manufacturer-stated 3,000 kg/m² option on die-cast rental. That is a product rating, not a slab assessment — an engineer must confirm the slab, any raised floor and point loads from trolleys.
Q3Can an LED floor screen be installed on the second floor?
Yes, if the slab and delivery route allow. Surface mounting is the usual answer upstairs because it avoids cutting the slab; the deciding questions are slab capacity, lift and door dimensions, and what sits below.
Q4What power supply does an LED floor screen installation need?
Size on peak draw of up to 800 W/m², not the 270 W/m² average: a 20 m² floor averages 5.4 kW but peaks near 16 kW on full white. Keep control on a separate circuit.
Q5How many days does an LED floor screen installation take?
On a 20–50 m² surface-mount floor, crews typically need one to three days to place and level cabinets, then one to two for wiring, mapping and calibration — a planning estimate, not a factory commitment. Recessed floors add weeks of pit work.
Q6Can I install an LED floor screen myself?
The cabinet layer is modular and quick-locking, so a competent crew can place and level a surface-mount floor. The pit or frame, electrical work, calibration and warranty position are harder to self-deliver; agree it with the factory before ordering.
Q7Can a surface-mount LED floor screen be taken apart and moved?
With the die-cast rental platform, yes: 11 kg quick-lock tiles, magnetic front maintenance and hang, curve and stack capability are built for it. Iron cabinet builds and recessed floors are effectively permanent.
Q8Can an LED floor screen be installed over carpet?
Not straight onto the pile. Feet compress carpet unevenly and the floor will not stay level, so use a rigid subfloor, or cut the carpet back to the slab inside the footprint and trim the perimeter.
Related guides: LED floor screen weight capacity explained and LED floor screen maintenance and spares.
LED Floor Screen Installation: The Short Version
Recessed when the floor can be opened and the surface must be flush; surface-mount when it cannot, or when the floor has to move. Either way the cabinets carry a nominal 2,000 kg/m², are serviced from the front, and the pit or ramp is built to a drawing issued for that cabinet.
The cabinets themselves are described across the full LED floor screen range; the site works above are what the contractor prices.